Vert1go User Manual
Overview
Vert1go is a spatial auto-panner that drives an audio source through 3D space — across the listener's horizontal plane and through height channels — using a library of pattern generators, drawable paths, and tempo-locked FX. It outputs to any speaker layout from mono through 9.1.6 immersive (16 channels), making it useful for stereo widening, traditional 5.1 / 7.1 panning, full Dolby Atmos bed automation, and creative sound design that goes well beyond conventional panning.
Vert1go can also encode to ambisonic streams (orders 1 through 7) instead of driving discrete speakers — for binaural rendering on headphones, VR work, or any immersive workflow where the final speaker layout is decided downstream.
The plugin supports VST3, AU or AAX formats on MacOS or Windows. Input can be mono, stereo, or — with the MULTI IN button engaged — any multichannel bus up to 9.1.6, in which case the whole input sound field can rotated and spread around the listener as a rigid unit. Output is whatever multichannel bus the host gives it, up to 9.1.6 in channel-based modes or 64 channels in 7OA ambisonic mode.
Getting Started
Installation
The installer places the plugin in the system-wide plugin directories:
macOS:
/Library/Audio/Plug-Ins/Components/                    (AU)
/Library/Audio/Plug-Ins/VST3/                          (VST3)
/Library/Application Support/Avid/Audio/Plug-Ins/      (AAX)
Windows:
C:\Program Files\Common Files\VST3\                    (VST3)
C:\Program Files\Common Files\Avid\Audio\Plug-Ins\     (AAX)
Launch your DAW and scan for new plugins. Vert1go appears in the spatial / surround category.
Basic Setup
- Insert Vert1go on a track with a multichannel output bus (stereo, 5.1, 7.1.4, 9.1.6 etc.).
- Pick the matching format from the OUT FORMAT dropdown in the header.
- Choose an XY pattern from the right-hand grid (Orbit / Heart / Star / …).
- Set PATTERN WIDTH for how far the source travels from centre, and MAIN TIME for the cycle length.
- Optionally pick a Z-PLANE preset to add vertical motion (height-channel formats only).
- Browse the factory presets in the header for ready-made starting points.
Output Formats
Vert1go supports the following output configurations:
| Format | Channels | Description |
|---|---|---|
| 1.0 | C | Mono |
| 2.0 | L, R | Stereo |
| 2.1 | L, R, LFE | Stereo with subwoofer |
| 3.0 / 3.1 | + C [+ LFE] | Front three |
| 4.0 / 4.1 | + Ls, Rs | Quad surround |
| 5.0 / 5.1 | + C [+ LFE] | Standard surround |
| 5.1.2 | + Ltf, Rtf | 5.1 with front height pair |
| 5.1.4 | + Ltf, Rtf, Ltr, Rtr | 5.1 with four height channels |
| 7.0 / 7.1 | + Lrs, Rrs | Seven-channel surround (sides + rears) |
| 7.1.2 | + Ltf, Rtf | 7.1 with front height pair |
| 7.1.4 | + Ltf, Rtf, Ltr, Rtr | Full Atmos immersive bed |
| 7.1.6 | + Ltf, Rtf, Ltm, Rtm, Ltr, Rtr | 7.1 with six heights |
| 9.1 | + Lw, Rw | Nine-channel surround with wides |
| 9.1.2 / 9.1.4 / 9.1.6 | + heights | Full immersive cinema bed |
The plugin auto-detects the host's bus channel count and selects the matching format on the first block. You can override by hand from the OUT FORMAT dropdown — entries that don't fit the current bus stay visible but are greyed out, so you can see what would be available on a larger track.
Speaker Layout
The dome visualisation in the STAGE section shows your current layout. Speaker labels:
- L / R — Front left / right
- C — Centre
- LFE — Subwoofer (no spatial position; see LFE below)
- Ls / Rs — Side surrounds (~90° from front)
- Lrs / Rrs — Rear surrounds (~135° from front, 7.x and 9.x formats)
- Lw / Rw — Front-stage wides (9.x formats only, ~45°)
- Ltf / Rtf — Top front heights
- Ltm / Rtm — Top middles (.6 formats only — directly overhead)
- Ltr / Rtr — Top rear heights
Ambisonic output
Vert1go can also encode to ambisonic streams (1OA through 7OA) for sessions where the speaker layout is decided downstream — binaural rendering, VR work, or feeding an external decoder. Which orders appear in the OUT FORMAT dropdown depends on the host DAW's bus support and the channel count of the track Vert1go is sitting on; pick the order whose bracketed channel count matches your track.
LFE
Vert1go does not generate LFE content. In MULTI IN mode, existing LFE content that arrives at the input is passed straight through to the output LFE, untouched.
Input Section
The vertical strip to the left of the dome holds the input gain meter and two mode buttons that decide how Vert1go reads the audio coming in.
Input meter & gain
Drag the fader to set input gain (-18..+18 dB). Double-click resets to 0 dB. The bars show live input level — stereo by default, and per-channel (one bar per bus channel) while MULTI IN is engaged.
MONO / STEREO
Sums the L and R input channels to a single mono source before panning — use it when you want one point source regardless of how the input is split. The button shows the current input mode at a glance, with a channel icon and colour:
- STEREO (button off, green, two-ring icon) — the default. L and R are treated as a stereo pair and placed at separate positions (see STEREO WIDTH).
- MONO (button on, blue, single-ring icon) — L and R are summed to one source.
Mutually exclusive with MULTI IN — turning either one on turns the other off. Switching from MONO back to STEREO restores the stereo spread to its default 90° pair.
MULTI IN
Decides how Vert1go interprets a multi-channel input bus. There are two ways to work, and you pick the one that fits what you're doing.
MULTI IN OFF (default) — bus folded down to one source. The whole input bus is combined into a single source that the engine then pans around the dome. Stereo content on any track works as expected; multi-channel buses (5.1, 7.1.4, etc.) are folded down so every channel's audio reaches the panner — including content panned to centre, sides, or surrounds. Use this when you want the bus to behave like one moving source.
MULTI IN ON — bus treated as a sound field. Each input channel is positioned at its real speaker location (L on the left, C up front, Ls to the side, etc.) and the whole arrangement rotates around the listener under engine control — like spinning the room. Use this on a real multi-channel mix or stem (5.1 drum bus, 7.1.4 orchestra bed, 9.1.6 immersive mix) when you want the spatial layout of the input preserved while the engine moves it as a unit.
While MULTI IN is on:
- The input bed always renders at its full canonical width — each channel sits at its own speaker position. (The STEREO WIDTH knob only shapes a mono/stereo source, so it is greyed out here.)
- LFE passes straight through to the output LFE — never spatialised.
- The input meter switches to a per-channel display so you can see signal on every bus channel.
- The dome shows the input as smaller dots arranged around the bright primary dot, so you can watch the field rotate.
- The button is disabled when the input bus is mono or stereo (nothing to do).
A quick example: drop Vert1go on a 5.1 group carrying a multi-mic'd drum recording, hit MULTI IN, pick Orbit — the whole kit revolves around the listener as one image instead of being summed first. Try Clock on the same source and the whole field hard-jumps between hour positions, giving each cycle a stepped, rhythmic feel rather than a smooth rotation.
Main Section
MAIN TIME (LENGTH + BPM)
The MAIN section's rate area is two bordered boxes — LENGTH on top, BPM below — with a TAP button beneath. Each box has its own label-and-tab header on the left/right, a big red value in the middle, and step arrows flanking the value.
The two boxes drive two independent settings:
| Box | Controls | Affects |
|---|---|---|
| LENGTH | How long one full pattern cycle takes | MAIN's pan period only |
| BPM | The plugin's master tempo | Filter / Modulation / Gate sync (and MAIN, when LENGTH is in BARS mode) |
LENGTH box
The top box. Two tabs at the right of its header pick how the cycle length is expressed:
- BARS (default) — Cycle is expressed as a musical division of the master beat. Step the arrows or scroll/drag to choose: 1/32, 1/16T, 1/16, 1/16., 1/8T, 1/8, 1/8., 1/4T, 1/4, 1/4., 1/2T, 1/2, 1/2., 1 bar, 2 bars, 3 bars … 64 bars (77 entries). Double-click the value to type one directly (e.g.
1/4,2bar,30bar). - SEC — Cycle runs at a fixed time independent of tempo. Display reads in milliseconds for short values (
250MS) and seconds for longer ones (4.0S). Double-click to type — acceptsms,s,sec,hz, or a bare number (treated as ms).
BPM box
The bottom box. At the right of its header, SYNC and FREE pick where the master tempo comes from, plus an independent LIVE toggle:
- SYNC (default) — Master BPM follows the DAW's tempo. The value is read-only here (no arrows shown next to it); change it in your DAW's tempo lane. Always two decimal places (DAW tempos can be fractional, e.g.
132.56). - FREE — Master BPM is set inside the plugin, independent of the DAW. Click arrows to step by 1 BPM, drag the digits up/down, double-click to type a value, or use the TAP button below. Range 20–400 BPM. The value is host-automatable (
Master BPMparameter) so you can draw smooth tempo curves in your DAW's automation lane — Vert1go interpolates them without phase jumps. - LIVE Runs the movement from the plugin's own internal clock so the pattern keeps animating even when the DAW transport is stopped, for performing live, or auditioning motion without starting playback in the host. Automatable via the
Free Runparameter.
The BPM is the master tempo: in FREE source, Filter / Mod / Gate sync rates follow it instead of the DAW. And if LENGTH is also in BARS mode, MAIN's cycle follows it too (so you can have MAIN doing 1bar at 60 BPM while your DAW is at 120). LENGTH in SEC mode is unaffected by BPM — its cycle is a literal time.
TAP button
Below the two boxes. Click in time at any tempo. The running average of the last 4 inter-tap intervals becomes the master BPM (only writes when BPM source is FREE — the button is greyed when SYNC). Pausing >2 seconds discards the history and starts a fresh average. Each tap flashes the button amber for visual confirmation.
PATTERN WIDTH
How far the source travels from the centre of the dome, 0–100%. At 0% the source sits stationary at the listener's position (centre of the dome). At 100% it reaches the speaker ring at the pattern's outermost point.
STEREO WIDTH
Spreads a stereo source around the moving engine position. At the default 50% the L and R input channels sit at the front left and right speaker positions (±45°, i.e. 90° apart). Lower it to narrow the pair toward a single point; raise it toward 100% to push them to opposite sides of the dome (180° apart). The dome shows the pair as two orange dots so you can see the stereo image move and rotate as one.
Useful for keeping a stereo image alive while panning: low values feel like classic stereo panning, high values let the source rotate as a wide stereo "pair" around the listener.
MULTI IN: This control only shapes a mono/stereo source, so it is greyed out while MULTI IN is on. In MULTI IN the multichannel bed always renders at its full canonical width — each channel sits at its own speaker position and the whole bed is flown around the listener by the movement engine.
FOCUS
Controls how tightly each source is pinned to its nearest speaker — trading smoothness of movement for separation. The third slider in the MAIN section.
- 0% (default) — soft spread. Each source is shared across its nearest speakers, so movement is smooth. A stereo pair's left and right can overlap a little where they share a speaker.
- Toward 100% — tight, near-discrete. Each source pulls onto its single nearest speaker, so a stereo pair keeps its left and right separate as it travels — useful for moving a stereo image around the room without it collapsing toward the centre. The trade-off is steppier hand-offs as a source crosses between speakers.
Works in every mode: in MONO it sets how pinpoint the single source is; in STEREO it preserves the L/R separation; in MULTI IN it keeps each input channel separate as the field rotates.
CW / CCW (Direction)
Reverses the pattern's direction of travel. The default is CW (clockwise looking down on the dome). Most pattern shapes have a meaningful direction sense — orbits, spirals, hearts and stars reverse their rotational direction; pendulums and triangles trace their path the opposite way around.
BOUNCE
When on, the source plays the pattern forward, then backward. Doubles the effective cycle length. Useful for symmetrical motion where you want the source to retrace its own path.
Play / Stop (motion pause)
The third button in the MAIN section bottom row (right of BOUNCE). Pauses or resumes the movement engine. The button shows a media-style icon that indicates the action it will perform on click:
- ■ Stop square (icon lit red) — Motion is running. Click to freeze.
- ▶ Play triangle (icon lit green) — Motion is paused; the source holds at the position it was at the moment of pause. Click to resume.
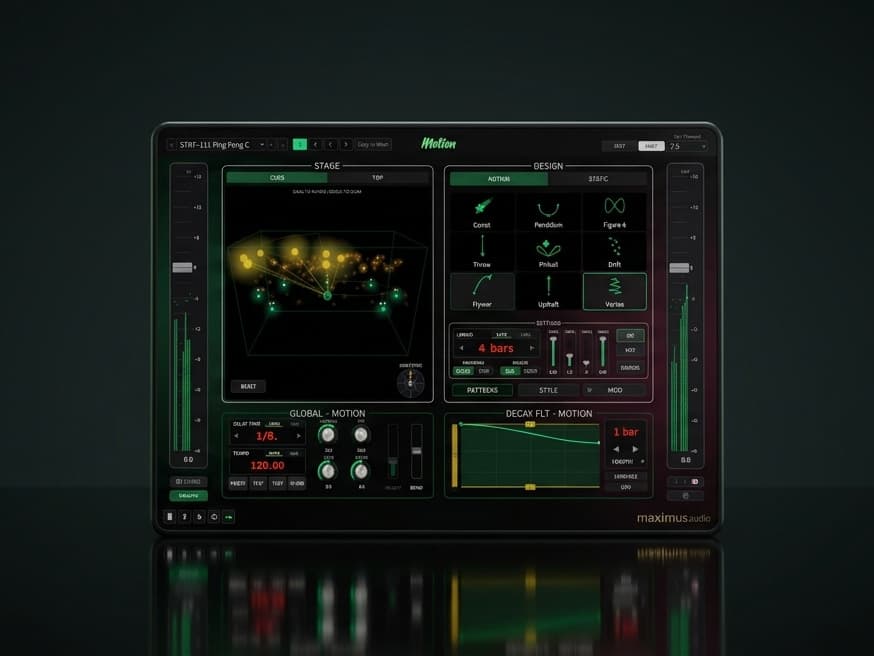
STAGE views (DOME / TOP / FX)
The tab strip above the left STAGE panel chooses what fills it:
- DOME - the 3D dome. Drag inside it to rotate the view, scroll to zoom. Shows the source dot, its trail, and the upcoming movement path.
- TOP - a top-down 2D view, looking straight down on the dome. This is where you place the movement's start position (see below).
- FX - the effects panel: GATE SEQ, MODULATION, and FILTER.
Start Position (SET START)
Sets where the movement begins. Switch the STAGE to the TOP tab and press SET START: a handle appears in the field. Drag it to the point you want motion to start from. Each time playback starts, the pattern begins at that point and flows on from there. It works whether you start the DAW transport or the Play / Stop motion button.
- SET START off (default) - the source holds its last position while stopped, and motion resumes where it left off.
- SET START on - the source rests at your chosen point while stopped, and the pattern begins there on playback.
The handle snaps to the nearest point the pattern can actually reach, so drop it on the visible ring or path for an exact match. Releasing the handle retriggers the movement so it re-aligns to the new start point. The start position also feeds the EXPORT XYZ lanes while stopped, so a downstream object panner sits at a known place between sections.
For automation, the same control is the Start Pos Mode parameter (Last / Anchor) with Start X (left/right), Start Y (back/front), and Start Z (floor/ceiling). X and Y run -1..+1 and Z runs 0..1, matching the EXPORT XYZ ranges.
Start Point (XY Angle) — host automation only
Sets the start position for the XY plane.
- 0° (default) — patterns start at 12 o'clock
- 90° — patterns start at 3 o'clock
- 180° — patterns start at 6 o'clock
- 270° — patterns start at 9 o'clock
Because it rotates everything together, a stereo pair stays intact as it turns, so you can park the pair facing any direction and orbit it from there. Works in mono, stereo and MULTI IN alike. With STEREO WIDTH at the default 90°, a Start Point of 0° lands L and R on the front left/right speakers; every 90° of rotation re-aligns the pair onto the next speaker pair around the room.
RETRIG
Bottom-left pill on the dome. Snaps the pattern phase back to its natural starting position so the next cycle is in sync with whatever you're triggering it against.
Each pattern lands on a sensible, ear-friendly start point: Orbit, Clock and Star reset to the front-centre speaker; Drift and the Pendulums reset to the left side; Z resets to the top-left corner. Reverse the direction with the CW/CCW toggle to flip those start-and-sweep directions.
RESET (dome view)
Bottom-right pill on the dome. Resets the 3D dome's rotation and zoom to their default angle. Has no effect on the audio — purely a view control. (You can also drag inside the dome to rotate and scroll-wheel to zoom.)
XY PLANE — Pattern Selection
Twelve XY movement patterns are available from the right-column grid:
| # | Name | Description |
|---|---|---|
| 1 | Orbit | Smooth circle around the listener. |
| 2 | Clock | Teleports between the 12 hour positions of a clock face. CW = 12 → 1 → 2 → … (clockwise around the listener); CCW reverses. No interpolation — each hour is a discrete jump, like dropping a row of dots around a clock. Pairs especially well with MULTI IN: a 7.1.4 input gets each channel hopping cleanly between hour marks. RETRIG snaps the source back to 12 o'clock. |
| 3 | Spiral | 3.5-turn ping-pong spiral, growing then shrinking. |
| 4 | Z | Top-left → top-right → bottom-left → bottom-right diagonal Z. |
| 5 | B Pendulum | Back-half arc, swings from L through dead-back to R. |
| 6 | F Pendulum | Front-half arc, swings from L through dead-front (C) to R. |
| 7 | Drift | Gentle L → R traversal with a wavy Y wiggle. |
| 8 | Triangle | Equilateral triangle with apex at front. |
| 9 | Lissajous | Figure-8 (∞ symbol) at 1:2 frequency ratio. |
| 10 | Zigzag | 12-corner zigzag spanning nearly full L/R width. |
| 11 | Star | 8-point star traced in sequence 0, 5, 2, 7, 4, 1, 6, 3. |
| 12 | Heart | Mathematical heart curve. |
The dome visualisation shows a green path preview of the selected pattern, with the orange source dot animating along it in real time.
XY PLANE — DRAW Mode
Switch the right column to DRAW to hand-draw your own XY trajectory inside a 2D top-down view of the dome. Four drawing modes are available from the toolbar above the draw circle:
- FREE — Drag to record a freehand curve.
- SMOOTH — Same as FREE, but every completed stroke is auto-smoothed.
- LINE — Click and drag to draw a single straight segment. Each segment teleports from the previous — useful for chained jumps between musical positions.
- DOT — Each click drops a numbered waypoint. The source teleports between dots in numerical order. Pair with DOT LENGTH (see below) to gate audio at each dot.
Drawing Toolbar
- CLEAR — Wipes the entire drawn XY path and any drawn Z curve.
- SNAP — Toggle on / off. When on, new drawn points snap to a unified target set: a 12-spoke × 5-ring polar grid (61 targets including the centre) plus the actual speaker positions of the current output format. SNAP applies to all four drawing modes:
- DOT — every click snaps.
- LINE — both endpoints snap (including the moving endpoint while dragging).
- FREE / SMOOTH — on mouseUp, every sample of the just-drawn stroke is snapped to its nearest target. Result: a quantised, machine-precise version of your gesture.
When SNAP is on, faint white target dots appear in the draw circle so you can see where points will land.
- Undo / Redo (the circular arrow icons) — Step through the draw history.
DOT LENGTH (DOT mode only)
When in DOT mode and at least one dot is placed, a DOT LENGTH LED appears at the bottom-right of the draw circle. It controls how long each dot's audio plays for inside its time slot:
- SYNC (default) — Length is a beat division: 1/32, 1/16T, 1/16, 1/8T, 1/8, 1/4T, 1/4, 1/4., 1/2T, 1/2, 1/2., 1 bar.
- FREE — Length is a raw ms value (1 ms … 2000 ms).
Each dot triggers at the start of its time slot in the MAIN cycle, plays for the dot length, then silences until the next dot. With MAIN = 1 bar and 4 dots, the dots fire on each quarter beat. With dot length set to a short value (e.g. 15 ms), the result is short rhythmic bursts of audio at four spatial positions per bar.
If the dot length exceeds the slot length, audio plays continuously — the gating is naturally bypassed.
DOT LENGTH also applies to dot segments inside mixed paths (combinations of DOT + LINE drawn together). Each dot segment is gated; each line segment plays continuously.
Z PLANE — Height
The Z PLANE section controls the source's vertical position (floor → ceiling). Active only when the output format has height speakers (5.1.2 and higher, and all 9.x.x formats).
Pattern Height (floor / ceiling)
The height curve is mapped into a vertical range you set on the Z PLANE display — a shaded band with a grab handle on its top (ceiling) and bottom (floor) edge, plus a POS strip on the left.
- Top handle — sets the ceiling (the highest point the curve reaches).
- Bottom handle — sets the floor (the lowest point).
- POS strip (left) — drag to slide the whole band up or down without changing its span. Works in both PATTERN and DRAW modes.
- Band body — in PATTERN mode, drag the middle to move the band; in DRAW mode the body is the drawing surface, so use the POS strip to move the range.
Drag the two handles together to pin the source at one fixed height — at the top it sits overhead, at the bottom at ear level. A source only reaches the overhead speakers if the output format has a height speaker at that position (e.g. a rear-placed source needs the rear-top speakers that 7.1.4 has but 7.1.2 does not).
PATTERN / DRAW Tabs
- PATTERN — Use one of 100 preset Z-axis curves selected by the LED below the viewer.
- DRAW — Hand-draw your own Z curve directly in the curve viewer. Four dedicated tools appear on the right edge of the viewer in this mode:
- FREE — Drag to draw the curve freehand.
- SMOOTH — Same as FREE, but every stroke is auto-smoothed.
- LINE — Click and drag to draw a single straight ramp segment.
- CLEAR — Wipe the drawn curve back to flat-zero.
Z Preset (heightShape, 0..99)
100 preset Z curves arranged in groups:
- 00 — Flat at mid-height (the neutral "no Z movement" default)
- 01 — Linear rise (floor → ceiling)
- 02 — Linear fall (ceiling → floor)
- 03..18 — Saw waves, 1–16 cycles per pattern cycle
- 19..34 — Sine waves, 1–16 cycles
- 35..50 — Step staircases, 2–17 levels per cycle
- 51..66 — Triangle waves, 1–16 cycles
- 67..82 — Square waves, 1–16 cycles
- 83..95 — Inventive shapes (exponentials, swells, random-walk staircases)
- 96..99 — Heartbeat, random walk, chirp, S-curve
The viewer above the LED shows the selected curve as a graph, with an orange phase cursor sweeping in real time as the pattern plays.
FX Tabs
Click FX in the header to open the three-tab FX panel: GATE SEQ / MODULATION / FILTER. Each tab has a power LED in its tab cell for independent on/off, and the active tab is highlighted with a lit-green pill.
GATE SEQ — Step Sequencer
A trance-gate-style amplitude sequencer with up to 32 steps. Each step has a state — Trigger, Hold, or Off — plus a velocity shown as a vertical bar.
- STEPS grid — Each step has THREE controls stacked vertically:
- On/off LED (small dot above the cell) — click to toggle the step on or off. Green = on, dark grey = off. Drag horizontally along the strip to paint (turn on) or erase (turn off) a whole run of cells in one motion — the first cell's initial state decides the direction. This is the only way to toggle a step while in IND envelope mode (where the cell click is repurposed for selection).
- The cell itself — drag vertically to set velocity (the green bar's height). Drag horizontally to paint TRIGGER + HOLD ties across multiple cells: the leading cell becomes a TRIGGER and each subsequent cell becomes a HOLD tie shown with a faint line at the bar top (Logic-style). In ALL envelope mode a single click also toggles the cell on/off; in IND mode a single click only SELECTS the cell.
- Step number (below the cell) — click to select that step for envelope editing without altering its on/off state.
- AMOUNT — Number of active steps in the pattern (1..32). Click arrows, scroll, drag the digits, or double-click to type a value.
- RESOLUTION — Base step duration: 1/4 / 1/8 / 1/16 / 1/32 / 1/64. Double-click to type a division name directly (you can also type
1/8Dor1/16Tto flip the matching modifier in one go). - D / T — Two tiny toggles to the right of the RESOLUTION LED's right arrow. D dots the current resolution (×1.5 duration), T triplets it (×2/3 duration). They are mutually exclusive — clicking one turns the other off. With both off, the resolution is the plain base value.
- RND — Randomize button (small square to the right of RESOLUTION). One click generates a fresh random pattern: step on/off states with the occasional HOLD tie, random per-step velocities, and a random IND envelope on every active step. AMOUNT and RESOLUTION are left untouched, so the time grid stays the same. Flip into IND mode after a randomise pass and every step will show its own yellow mini-envelope curve.
- MIX — Wet/dry blend of the gated signal vs. the original.
- ENVELOPE editor (bottom half) — Visual ADSR curve with four draggable nodes (Attack / Decay / Sustain / Release). Drag the curve handles horizontally for time-axis nodes or vertically for the sustain plateau. The four readout cells below the curve show each value 0..100 — drag them vertically or scroll over them to fine-tune; double-click to reset to default.
- Patterns — 8 separate pattern slots (the active slot is automatable; per-step state persists with the plugin instance).
The step grid shows a live orange phase cursor as the sequencer plays.
Envelope scope: ALL vs IND
Two small pills in the top-right corner of the envelope display switch between two scopes:
- ALL (default) — Envelope edits apply to every triggered step. The step grid stays clean: just velocity bars.
- IND — Envelope edits apply only to the currently selected step. Every other step keeps its own envelope (either the global ALL envelope or its own per-step custom envelope, if you've already given it one).
Selecting a step (IND mode)
The selected step is marked with a yellow outline in the grid. There are two ways to pick it:
- Click the step's number in the strip below the grid. The strip is the dedicated, always-safe way to select a step — it never toggles the cell's on/off state. The currently selected number gets a yellow background pill, and in IND mode every number gets a faint dark pill so it's obvious that the strip is clickable.
- Click the cell itself. In IND mode, clicking a cell only selects it. Use the on/off LED above the cell to flip the step on or off without leaving IND mode.
In ALL mode, cell clicks toggle on/off as usual and the number strip is still clickable (but selection has no audible effect, because envelope edits go to every step anyway).
Mini-envelope indicators (IND mode)
In IND mode each ON step also draws a small envelope curve overlaid on its velocity bar:
- Green curve — step uses the global ALL envelope.
- Yellow curve — step has its own custom envelope override.
This gives you an at-a-glance view of which steps you've customised. Flipping back to ALL clears the selection outline, the number-strip highlight, and the per-step curves, so the grid returns to its clean "just velocity bars" look.
When the sequencer plays a step that has a custom envelope, the audio engine uses that step's A/D/S/R instead of the global one — so the per-step shapes you author in IND mode actually drive the gate's amplitude envelope on playback.
MODULATION — Flanger / Phaser / Chorus
Three switchable modulation effects (FLANGE / PHASER / CHORUS — pick one with the mutually-exclusive type buttons on the right).
- Visualiser (top half) — Animated LFO waveform. Faint blue ghost shows the R-channel LFO when WIDTH > 0.
- SHAPE (right column of viz) — LFO waveform: Sine / Triangle / Saw / Square.
- SYNC + RATE (left column of controls) — Same SYNC/FREE convention as MAIN. RATE picks a tempo division (1/32 … 32 bars in 1-bar increments) or a Hz value (0.05–12 Hz).
- DEPTH — Modulation amount.
- FBK — Feedback. Higher values increase resonance / metallic character.
- WIDTH — L/R LFO phase offset (0–180°). 0 = mono LFO; 1 = R lags L by half a cycle for a wide stereo image.
- MIX — Wet/dry.
Type-specific behaviour:
- FLANGE — Short modulated delay line (0.5–5.5 ms). Comb-filter sweep, can self-resonate with feedback.
- PHASER — 4-stage all-pass cascade with modulated cutoff. Smooth notch sweep.
- CHORUS — Longer modulated delay line (5–25 ms). Detune / doubling feel, feedback automatically scaled lower for natural sound.
FILTER — LFO-Modulated SVF
A state-variable filter with LFO-driven cutoff and an envelope follower.
- Visualiser (top half) — Frequency-response curve, 20 Hz – 20 kHz (log axis), live cutoff cursor (orange) sweeping with the LFO + envelope.
- SHAPE (right column of viz) — Same Sine / Tri / Saw / Square LFO shape menu.
- HP / BP / LP (right column of controls) — Three mutually-exclusive filter types.
- SYNC + RATE — Same as MOD.
- DEPTH — LFO modulation range around CUTOFF, ±2.5 octaves at full depth.
- CUTOFF — Base cutoff frequency (80 Hz – 16 kHz, log). The LFO modulates the actual cutoff around this point.
- RES — Resonance / Q (0.7 .. 8).
- ENV — Envelope-follower amount. Adds 0..+2 octaves on top of the LFO based on input peak level. At 0, only the LFO modulates the cutoff. At 100%, loud input pushes the cutoff up.
Presets
Use the preset browser in the header to load, save, copy and rename presets.
- Factory presets — 128 built-in presets in seven groups:
- 01–24 USEFUL — Conventional spatial-panning patterns for everyday mixing tasks.
- 25–48 IMAGINATIVE — Creative combos pairing patterns with the FX tabs.
- 49–64 EXTREME — Boundary-pushing FX-heavy presets that lean into sound design.
- 65–80 RHYTHMIC — Beat-locked, percussive patterns with gate stutters and tight Z-step shapes.
- 81–96 AMBIENT — Slow, evolving, atmospheric — long rates and gentle sines for pads and tails.
- 97–112 ELECTRONIC — Synth-friendly, FX-driven (phaser / flanger / chorus / filter-LFO) presets.
- 113–128 EXPERIMENTAL — Inventive Z-shapes, asymmetric movement and stacked FX for sound design.
- A/B/C/D slots let you compare four different settings quickly.
- Copy to Next copies the current slot's settings to the next slot for A/B comparison.
- Every preset includes XY pattern, MAIN time, width, Z-plane shape, and (where applicable) GATE / MOD / FILTER configuration.
Step-sequencer step patterns are stored as plugin state and travel with the plugin instance but are not part of factory preset definitions.
DAW Automation
Every parameter visible on the GUI is automatable from your DAW's automation pane. Parameter names mirror the on-screen controls:
- Main / Movement — Input Gain, Output Gain, Pattern, Rate, Distance (Pattern Width), Direction, Tempo Sync (= LENGTH BARS/SEC toggle), Master BPM (FREE-source master tempo, 20–400 BPM, host-automatable for smooth tempo curves), BPM Source (SYNC/FREE), Bounce, Play/Stop (the media-icon button next to BOUNCE — automates the engine's start/stop), Free Run (LIVE: runs the movement from the internal clock with the transport stopped, host-automatable), Retrigger (fires once per rising edge), Stereo Width, Height Shape, Mono, Link Out, Start Pos Mode + Start X / Y / Z (see "Start Position" earlier in this manual)
- DOT — Dot Length (ms), Dot Length (Div), Dot Length Sync
- GATE — Gate Enable, Gate Sync, Gate Attack, Gate Decay, Gate Sustain, Gate Release, Gate Mix, Gate Resolution, Gate Active Pattern
- MOD — Mod Enable, Mod Type, Mod Rate, Mod Sync, Mod Depth, Mod Feedback, Mod Mix, Mod Shape, Mod Width
- FILTER — Filter Enable, Filter Type, Filter Rate, Filter Sync, Filter Depth, Filter Cutoff, Filter Resonance, Filter Shape, Filter Env
- Object Automation Mode — Pos Out X/Y/Z Left, Pos Out X/Y/Z Mono, Pos Out X/Y/Z Right (nine Mono and L/R triplet params), Src 01..16 X/Y/Z Pos Out (48 per-source params, grouped under "Per-Source Pos Out"), Pos Out Write (master enable), Pos Out Mode (L/R, Mono, L/R + Mono, Multi, All)
The drawn XY path, drawn Z curve, and gate-sequencer step patterns are stored with the plugin state and persist across session saves but are not directly automatable parameters.
Export XYZ — driving a DAW's native object panner
Click EXPORT XYZ in the MAIN section (between BOUNCE and the play/stop button). While enabled, the movement engine's current position is written every audio block to host-automatable parameters that a downstream object panner can follow.
Two sets of parameters are available:
Mono and L/R triplets (9 params) — three independent X/Y/Z streams named Left, Mono, and Right:
| Param | Range | Meaning |
|---|---|---|
Pos Out X {Left, Mono, Right} | -1..+1 | Left ↔ Right (0 = centre) |
Pos Out Y {Left, Mono, Right} | -1..+1 | Back ↔ Front (0 = centre) |
Pos Out Z {Left, Mono, Right} | 0..1 | Floor ↔ Ceiling (0 = floor) |
Per-Source (48 params, grouped) — one X/Y/Z triplet per MULTI IN source slot, named Src 01 X Pos Out through Src 16 Z Pos Out. These sit under a Per-Source Pos Out folder in DAWs that respect parameter groups (Cubase, Nuendo, Studio One, Logic). For each active input channel, the corresponding Src NN triplet carries that channel's individual rotating position around the listener.
Why two sets? They serve different translation workflows:
- The legacy Left / Mono / Right triplets describe a phantom stereo-pair-plus-centre derived from the engine position and the Stereo Width parameter. Mono is the engine centre; Left and Right are the L/R phantom-source positions implied by Stereo Width. Atmos objects are mono, so a stereo source consumes two object slots — Left and Right map to those two slots; Mono is useful as a "phantom centre" object, as the only path for a mono source, or as a third convergent path (e.g. three mono harmony tracks driven from one Vert1go).
- The Per-Source triplets describe each input channel's actual rotating position when MULTI IN is on — i.e. for a 5.1 bed, Src 01..05 carry the L, R, C, Ls, Rs speaker-channel positions as the engine rotates the field around the listener. LFE is skipped (it has no spatial position), so 9.1.6 input drives Src 01..15 and Src 16 stays idle. This is the path for translating a multichannel bed into individual Atmos object tracks downstream.
Stereo Width drives the legacy L/R export unconditionally. Even on a mono source track, raising Stereo Width fans the Left and Right triplets symmetrically around the Mono centre — you don't need real stereo input or the MONO button off for the export side to spread. At width = 0, Left and Right collapse onto Mono.
Choose which lanes get written using the small ▾ arrow on the right of the EXPORT XYZ button. Defaults to Mono.
| Option | Writes | Use for |
|---|---|---|
L/R | Legacy Left + Right only | Driving a stereo object panner (two slots, no centre lane). |
Mono | Legacy Mono only — default | A single mono object panner, or when you only need the phantom centre. |
L/R + Mono | All three Mono and L/R triplets | Three convergent paths from one Vert1go (e.g. three vocal harmonies), or when you'd rather pick lanes downstream in the host. |
Multi | Per-source slots 1..N | Translating a MULTI IN bed into individual object tracks — one Src lane per active input channel. The L/M/R readout under the STAGE hides; the per-source dot constellation on the dome shows what's being written. |
All | Mono and L/R triplets AND per-source slots | When you want everything — the phantom-pair summary AND every individual source. |
Unselected lanes hold their last value at the host and stop sending automation updates.
Record the relevant parameters onto automation lanes in your DAW while the section plays, then copy/paste or link that automation onto the destination object panner's pan parameters in your DAW.
Pro Tools
The position lanes carry Pro Tools' own panner names: front pos left, rear pos left, height left, the right-channel equivalents, and the matching Src NN per-source lanes. Link each lane to the identically-named parameter on the destination panner and the source follows Vert1go's motion.
Light Mode
Click the LIGHT button in the header to toggle between dark and light colour schemes. The setting persists across sessions.
Licensing
Click the key icon in the footer to manage your license. From the licensing dialog you can:
- Activate a license key
- Start a trial
- Open the purchase page in your browser
Tooltips & Help Mode
Vert1go has a built-in help-mode system that turns every control into a self-documenting tooltip — handy when you're learning the plugin or want a quick reminder without leaving the GUI.
Turning help mode on
Press the ? button on the right of the output meter (header strip). The button highlights to show help mode is active. Hover any control while help mode is on to see its inline tooltip. Press the ? again to switch back off.
Tooltip language
Next to the ? button is a flag button. Click it to choose the language your tooltips display in. Vert1go includes 22 languages, and your choice is remembered across sessions.
Help & Support
- See the Tooltips & Help Mode section above for the inline
?-button help system. - Click the book icon in the footer for this manual.
- Click the lightbulb icon to send a feature request.
- Click the bug icon to report an issue (auto-fills plugin version, build, OS, and DAW).
- Visit max1musaudio.com for support, downloads, and account management.